Upload Historical CSV Data to a Device
Starting from DCC 6.5, administrators can upload historical CSV data files directly to a device in DCC. This allows analysis of machine data even when the equipment has never been connected to the Internet.
The feature is primarily intended for service and troubleshooting scenarios, where technicians copy data locally from machine dataloggers and upload it to DCC for rapid analysis.
It can also be used to import historical data from another platform when exported in the supported CSV format.
Availability
The Upload Historic Data feature is available only for companies using the Enterprise plan. Contact your point of purchase for more info on how to upgrade from the per device license plan to the Enterprise plan.
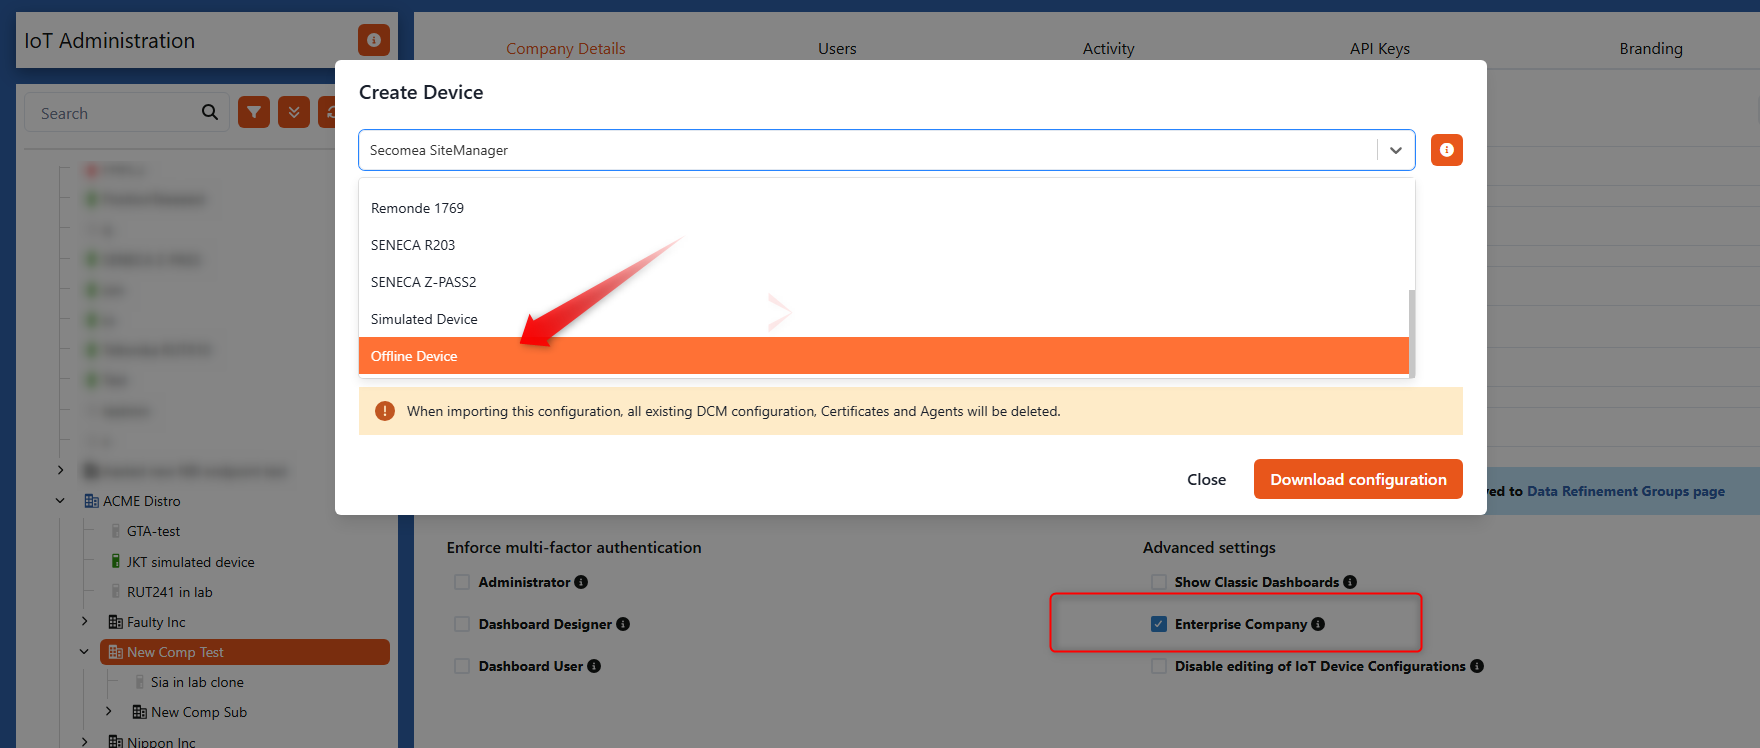
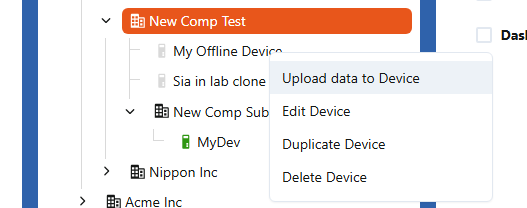
When the Enterprise plan is enabled, the Upload data to Device option becomes available in the device context menu.
You can either create an Offline Device specifically for this purpose, or you can choose an existing MQTT type device, to upload the data to. This is typically used when a device was previously connected online but later must operate without a direct connection to DCC due to policy or network restrictions.
When to Use Offline Data Upload
Uploading historical data is useful in several situations:
- Troubleshooting machine faults
- Analyzing events leading up to failures
- Importing data from machine dataloggers
- Migrating historical machine data from other systems
- Performing on-site diagnostics without connecting machines to the Internet
Technicians can simply copy files from a machine datalogger and upload them to DCC for analysis.
Opening the Upload Dialog
To upload offline data:
- Navigate to the device in the device tree.
- Right-click and select Upload data to Device.
This opens the Upload Historic Data dialog:
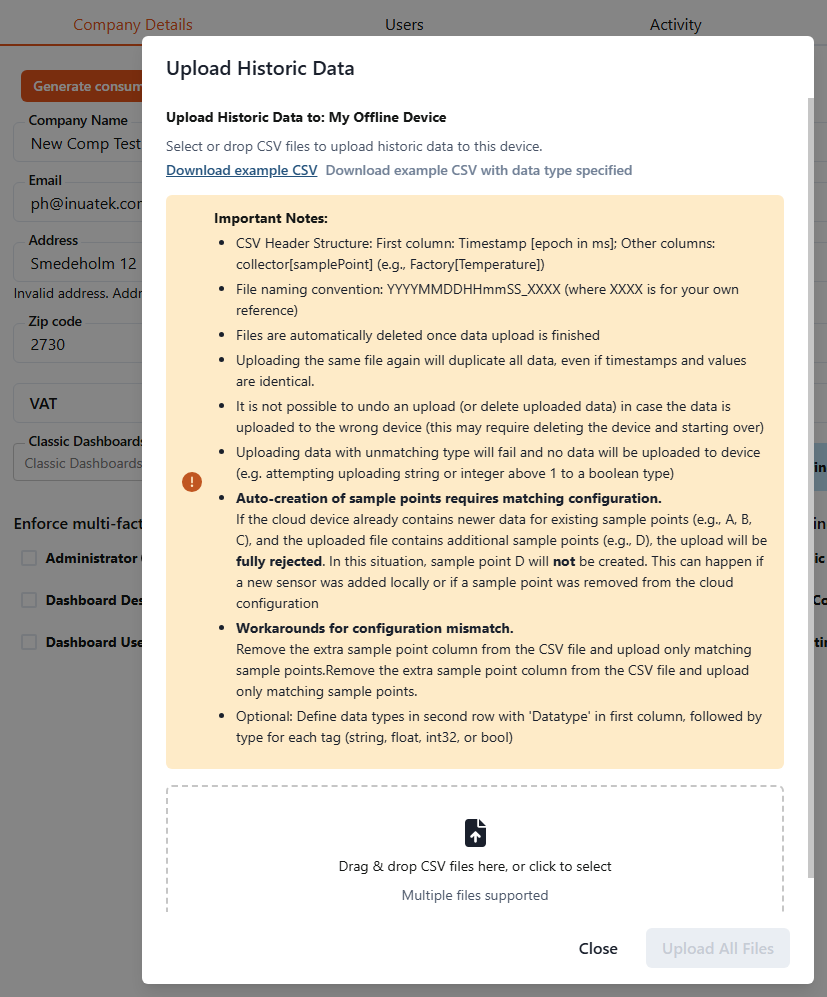
The dialog includes:
- Description of the CSV format
- Download links for example CSV files
- Important limitations and notes
- Drag-and-drop upload area
- Upload log showing previous uploads
CSV File Requirements
The uploaded files must follow a specific CSV structure.
Header Structure
The CSV file must follow this structure:
- First column: Timestamp (epoch in milliseconds) for example
1704105600000(to validate your time stamps, you can use this epoch converter: Epoch Converter - Unix Timestamp Converter) - Other columns: Sample points in the format:
collector[samplePoint]
Example:
Factory[Temperature]
Factory[Pressure]
Example CSV File
Example without explicit data types:
timestamp,Factory[Temperature],Factory[Pressure],Factory[MotorSpeed]
1704105600000,42.1,5.4,1450
1704105660000,42.3,5.5,1452
1704105720000,42.4,5.6,1455
Example CSV With Data Types
Optionally, the second row may define data types.
The first column must contain the value:
Datatype
Supported types:
- string
- float
- int32
- bool
Example:
timestamp,Factory[Temperature],Factory[Pressure],Factory[Running]
Datatype,float,float,bool
1704105600000,42.1,5.4,true
1704105660000,42.3,5.5,true
1704105720000,42.4,5.6,false
File Naming Convention
Uploaded files should follow this naming convention:
YYYYMMDDHHmmSS_XXXX.csv
Example:
20260121114523_machine1.csv
Where:
- The timestamp represents the start of the dataset
XXXXis an optional reference identifier
Each file typically contains one day of data.
Uploading CSV Files
To upload historical data:
- Open the Upload Historic Data dialog.
- Drag and drop CSV files into the upload area, or click to select files.
- Multiple files can be uploaded at once.
DCC will automatically:
- Parse the CSV files
- Match sample points with device configuration
- Process the newest data first
- Create sample points when possible
Processing the newest files first ensures that recent data becomes available quickly.
Note that processing large files with many sample points or large timespans, may take from minutes to longer processing times depending on file size, number of sample points, and available system resources. For very large files, there is also a risk of truncation or handling errors.
Upload Logs
All upload operations are logged.
The log includes:
- File processing status
- Data validation results
- Upload errors
- Summary of imported records
You can review the results in the Previous Uploads section of the dialog.
Important Limitations
The current 6.5 implementation includes several limitations that administrators should be aware of.
Data Deletion
Uploaded data cannot currently be deleted or undone.
If data is uploaded to the wrong device, it may be necessary to delete the device and start over.
Duplicate Uploads
Uploading the same file again will duplicate the data, even if timestamps are identical.
It is therefore recommended to keep historically uploaded files, so you can delete the device and start over, with all relevant data
Data Viewer Updates
Uploaded data is treated as historical data.
To view the new data in dashboards or data viewers, you must refresh the page.
Data Type Validation
If a value does not match the defined data type, the upload will fail.
Example:
- Uploading a string value to a numeric sample point
- Uploading integers larger than
1to a boolean sample point
Sample Point Configuration
Automatic creation of sample points requires a matching configuration.
If the device already contains newer data for certain sample points, and the uploaded file contains additional sample points, the upload may be rejected.
Example scenario:
Existing sample points:
A, B, C
Uploaded file contains:
A, B, C, D
If the configuration does not match, the upload will be rejected and sample point D will not be created.
Workaround for Configuration Mismatch
If this happens:
- Remove the extra sample point column from the CSV file.
- Upload only matching sample points.
Best Practices
To ensure successful imports:
- Split data into daily CSV files
- Ensure consistent sample point names
- Validate the CSV structure before uploading
- Avoid uploading the same file multiple times
When importing historical data from another system, it is recommended to test the upload on a new device first before importing into a production device.